skip to main |
skip to sidebar

- Try the Montagerator. You can create with your own images or use some of the options provided on the site. I chose to leave text overlay out this time. The red and white snowflake designs I had previously created using Photoshops tools.
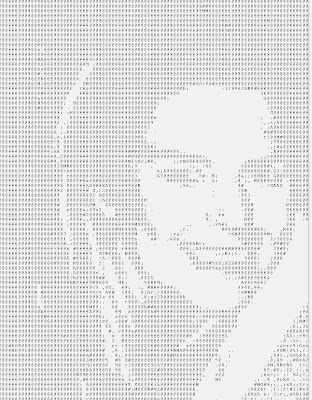
- Have fun with this Photo2text generator. It will transform your photo using random letters. It will work on reduced sized images with greater success.

- If you just need to get some inspiration. There is site which generates random text collages. Linguasso.

- This is a simple way to inspire an abstract and tidy piece of art. Your name is the starting point. See where the process will take you. Spell your name but not in the traditional left to right sequence. Each letter must touch at varying angles but do not overlap the letters. Draw a frame around the cluster of letters and then make various color choices to fill in the shapes created by the name jumble. The beautiful picture above was made by Krystle Seu. She decided to add a curve at the end of each of her letters . It reminds me of latticework or calligraphy or delicate stained glass.

- Here is a wall display of folded books. My favorite Charter School was fortunate in receiving a number of new Dell computers for their library. But there was an almost overwhelming amount of waste with the discarded packaging. The Extended Day teachers and I tried to salvage the cardboard for future art projects. The keyboard cardboard boxes proved to work well as looms. And the booklets that came with them were not essential so we collected them and came up with a very pleasing origami project. It really was a good feeling for all to create and recycle.

- We have snow in my part of the country. This is a great interactive snowflake maker by Zefrank. It has a 3D option too.

- I know I can be outdone. Go to the Scribbler site and give it a try.


- I think there may be an easier way, but here I can show you a pixelated image that I was able to create on Picture2Life. I then uploaded it to Colorchords to get the color palette and now a needlepoint canvas can be prepared and yarns selected from any uploaded image.
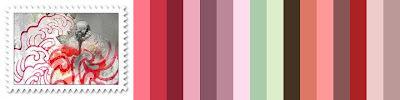
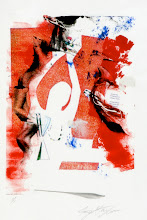
- This image I call "Bird in Red" I used Photoshop to create the blended image and watercolor effects. The stamp frame I added as well but the gist of this post is the wonderful color palette that you see to the right of the image. It could be useful to me if I were to translate the image further and make a study of it in acrylic or chalk. Colorchords offers you a very convenient and pleasing way to collect color information from your photo. it does have parameters regarding the size of your photo that you might wish to upload. shrinkpictures.com can help you with that.

- Here is an exercise that is sure to give instant gratification and you can add it to your list of ways to recycle. I used magazine pages here to create an optical illusion . Just cut vertical curved lines into the horizontal page, leaving the top and bottom intact. take another horizontal page and cut curved sections on the horizontal but this time cut through to edges creating strips. Be sure to keep them in sequence while you weave them through. Try this with two of your own photographs. I have seen it done where a night and day shot were taken of the same scene and this cut and weave method was used producing very appealing results.

- MoMa has an online interactive site called The Red Studio. It is meant to encourage teens to explore art study. Try the fauxtogram. It is similar to the photogram of darkroom days. And you can also find a nice intro to the work of Man Ray.http://www.moma.org/interactives/redstudio/

- Have fun with this collage generator. You type in some text and then wait for an image surprise. Go to typoGenerator.